My girlfriends are part of who I am. I don't know what I would do without them in my life. We've shared laughter, tears, wine, food, great stories, days shopping, wine, movie premiers, the triumphs and trials of parenting, parties, wine, and life in general with each other. They are the girls I can talk with anything about. We accept and love each other for who we are. I have shared so many amazing moments with these ladies and I cherish each and every one of them!
Being a crafty soul, I love to make gifts for family and friends as I really feel it adds a personal touch. One of the gifts I made for a girlfriend(years ago) was a memory box. I purchased a wooden box from a local crafting store, decorated it and then filled it with photos and mementos from years gone by. I loved it and have made similar boxes for family members.
This is a relatively simple gift to pull together. You will need:
*Wooden box - available at most crafting stores. Mine had a latch and handle on it.
*Ribbon - one to wrap around the box and one (thinner) for the handle
*Rub on decals/words.
*Embellishments - I used a variety of items from companies such as K&Company, Jolee's, a brad, fabric flowers, some very cute scrabble style "sticker" letters, and a few other odds and ends. Use your creative energies!
*Mod Podge
*Crafters glue
*1 sheet of scrapbooking paper
*Photos of whatever you are showcasing for box front
*Pictures and memorabilia for inside the box.
To Make:
I traced the front and back of the box onto the paper and then cut it out. Be sure to trace onto the back of the paper. Then apply a light layer of mod podge to the front and lay the paper in place. Allow to dry and then repeat with the back side. If you want a glossy look to the paper, you can put light layer of mod podge over the top of the paper. Just be careful not to overdo it so the paper bubbles. Next cut a length of ribbon to be wrapped around the box(as shown above with the brown ribbon). I glued this ribbon into place. Where the ribbon ends meet, I put the flower over that point. Tie some thinner ribbon(white) around the handle. Again I "spiced" up the knot of the handle ribbon with a little ornamentation. Next I added my photo. Then I put on the rub ons and any other embellishments that I wanted. On the inside of the box I place another rub on saying and rub on flowers. Then I filled the box with some photos and other memorabilia. Done!
The finished product was great. You can easily also paint the outside of the box if you would like too. If you do opt to pain the outside of the box, I would do that first and then proceed. I simply liked the look of the natural wood along with my other embellishments.
Happy crafting!
Tuesday, January 31, 2012
Ten Wishes
My family, my children --- they are my life! I want the best for them as they grow and I want them to always know how very much I have always, do, and will always love them. I love to scrapbook and I feel that scrapbooking/creative memory keeping provides me with a great way to not only document the past, but to tell stories and record hopes, dreams, and thoughts for the future. So, when my children were ages (almost) 2 and 13 I made a page that listed 10(of the many) wishes that I had for their futures.
*May your life be filled with excitement, great memories, love, laughter, and joy
*May you find happiness in the little things.
*May you always believe in yourself.
*May you have the courage to do what is right and stand up for what you believe in.
*May you know true joy in your life.
*May you find true love.
*May you fine a career path that is fulfilling and enjoyable.
*May you always know that you family and God are your strength and support.
*May you always remember that you are loved so very much.
*May you realize all of your dreams
-----------------------
*May you remember to keep on believing in fairies and wishing on stars.
*May you find your prince, your knight in shining armor, and know true love.
*May you learn to find happiness through simplicity.
*May you always have time to laugh and play.
*May you find a life of peace, balance, and joy.
*May all your dreams come true.
*May you always be true to yourself and kind to those around you.
*May you always be filled with hope.
*May you always know how much you are loved.
*May your journey through life be filled with an unending flow of blessings from God.
Sunday, January 29, 2012
Custom Piggy Bank
I had looked for a cute piggy bank for our daughter for a while and I never found exactly what I was wanting. So, I decided to make my own for her one day when I found some "blank" white piggy banks during a visit to our local Michael's craft store. It was relatively simple to create, just let your creative juices flow. You can also look up "piggy banks" in a Google search and view images to get some ideas. But, here is what I did.....
Supplies:
*"Blank Canvas" piggy bank. These can usually be found at most craft stores. I know that our local Michael's, Joann, and Hobby Lobby carry them. They are not usually on sale, but that means you can apply the typical 40% off coupon to them!
*Paints that you will need for your chosen design
*Paint brush(if applicable to your design).
Instructions: These are hard - so take notes. Take piggy bank out of packaging. Get paints(and brushes if applicable ready). Get your creative juices flowing and decorate! For this version I purchased an opalescent and purple puffy paint, the kind that have the tip on top for application. I then just started applying dots in "somewhat" of a pattern and just let my creative self take the design wherever it went. This was the end result! I was fairly pleased and our daughter likes it too!
The Wizarding World Of Harry Potter
The next ride is located next to The Forbidden Journey and it is called Flight Of The Hippogriff. This is a family friendly roller coaster. Our four year old daughter says it is her favorite and she loves holding her arms up in the air as the coaster speeds you through twists and twirls amongst the pumpkin patch by Hagrid's Hut.
The final ride(for now) is called The Dragon Challenge. For those of you who visited the park prior to The Wizarding Worlds' creation, this was known as Dueling Dragons. Now, once you enter this ride, you have the option of choosing to ride on either a Chinese Fireball or a Hungarian Horntail. I must say this floor less roller coaster is one of my favorites!
There are three "shows" within The Wizarding World. The first is the frog Chorus. This delightful show showcases the Hogwart's choir and, of course, singing frogs! I couldn't stop smiling throughout the performance and our daughter was enchanted with the singing frogs.
Another treat is the TriWizard Pep Rally. During this show Witches from Beauxbatons and Wizards from Durmstrang provide the audience with a brief exposition of each school's respective performance.
The Final "show", to me is not really a show but more of an experience. If you opt to do this, I will warn you that lines can be very long, but it is a very unique experience! Upon entering Olivander's Wand Shoppe the lucky witch, or wizard, gets to test out several wands until just the right want picks them! At that point, wind whips through the air and it is apparent that a wand has chosen its' master. If you do not want to wait in the line, you can purchase wands in the store within Hogsmeade Village.
The Village of Hogsmeade is a delight in itself! Although there are not rides in the village, it is an area that you need to allow plenty of time to explore! Dervish and Banges shop offers a wide variety of Harry Potter themed souvenirs, clothing, and wands. I like to buy a few postcards here and them have them stamped with the official Hogsmeade stamp at The Owl Post. You can also have the inside of your wand box stamped as well. Then, simply wander along the street and take in all of the amazing details. You can easily picture yourself in the movie with all of the witches and wizards stocking up on their magical supplies. While exploring, be sure to try a Pumpkin Juice and a hot or iced Butterbeer. I am partial to the iced Butterbeer and treat myself to one every time I visit! Also keep an eye out for the owl clock in the village square!
Another "must do" while in Hogsmeade is a visit to Honeyduke's candy emporium and Zonko's These two stores are a complete delight to the senses! Yes, they have chocolate frogs and every flavor jelly beans!
A visit to The Wizarding World of Harry Potter would not be complete without getting a close up view of The Hogwart's Express Train located at Platform 9 3/4. It is very lifelike and a great photo opportunity with the train conductor.
If your a bit hungry, be sure to try lunch at The Three Broomsticks. The food is themed around traditional English meals. I can also state that it is very pleasing tasting! They have a great selection of dining options for even the picky eaters! Below are a few more snapshots from the park.
Hagrid's Hut
Mandrake Plant as can be seen while in line for The Forbidden Journey
Dumbledore's Office(look closely at the balcony and you'll see Dumbledore in the shadows)
The Butterbeer is here!
Deliciousness in a cup! Butterbeer!
Attention to detail on Hogwart's Castle
A replica of Hermione's dress in a storefront window.
The Dark Forest that surrounds Hogwart's.
A visit to The Wizarding World of Harry Potter is like nothing you've ever experienced. It is truly magical!
Saturday, January 28, 2012
It's In The Eyes
"Seek the wisdom of the ages, but look at the world through the eyes of a child."
~Ron Wild
The eyes of a child are so full of truth, wonder, hope, and magic. It is in the eyes of a child that so much beauty can be found. I took this photo one day while we were outside playing in the backyard. I remember it. The dogs were running around, we had finished planting some new flowers in our butterfly garden, and I had been chasing my little "ladybug" around the yard. Then, she climbed to the top of her castle, slid down to the bottom, and just sat there and laid back against the slide. In that one simple, pure moment life was perfect. We were both living life in the moment and enjoying the pureness of life in that moment.
I love the above quote by Ron Wild. Aging, growing, and learning are inevitable parts of life. Seeking wisdom and reaching for our dreams are wonderful endeavors and gifts. But, sometimes while we are on our life's journey, we forget to stop and smell the roses. Sometimes we forget to feel the blades of grass between our toes. Sometimes we don't slow down and watch the clouds floating by or the birds dancing in the sky. Sometimes we don't really stop and listen to the leaves rustling in the wind or water running in a stream or birds singing a song to welcome the morning. We used to do these things as a child, but as we mature we stop looking at the world with such wonder.
Today, if for only a few minutes, try to see the world through the eyes of a child. Smell the flowers(or crisp winter air), bathe in the warmth of the sun, and giggle. Delight in the magical beauty of the world and the blessings that surround you!
Friday, January 27, 2012
Tiered Planter
Stuff you will need:
*1 Piece of rebar - mine was 5' long and I purchased it at a local home builders store.
*1-2 bags of potting soil, dependent upon the size of planting containers you use.
*4 Terra cotta pots of varying size
*4 plants. I like the plants that tend to spread out a bit, like a vine so they can cascade down the planter.
*Starter fertilizer for plants.
*Water(of course)
*Hammer
*Garden hand shovel
Putting it together: Start by pounding the rebar into the ground where you intend to place the planter. You will want to be sure that about 1/3 of the length of rebar is in the ground for stability. Now, slide the largest Terra cotta pot over the rebar by inserting the rebar through the hole in the bottom of the pot. Fill the bottom pot 2/3 full with soil. Place the next largest pot over the bar and lay into the foil of the bottom pot at an angle. The rebar will come through the bottom hole and when you angle the pot it will rest against the side of the top of the next pot. Now fill this pot 2/3 with soil. Repeat this process with the last two pots. Once all of the pots are assembled and filled with soil, create a small "hole" for your plants and put a little starter fertilizer in the bottom. Next place your chosen plants in each pot and water! Done! Like I said - very simple and cute!
A Jar Of Blessings
Cherish your blessings. It is a seemingly simple statement. But, I think that, all too often, we forget that our lives are blessed and wonderful in so many ways. I love to make personalized gifts for family. So, one Christmas I made a "Blessings" jar. It is a very simple craft to put together and as I put it together it also helped me to remember all that I am grateful for in m life. I filled this jar with 52 "blessings". Each one was on an individual piece of paper that was rolled and tied with a ribbon. I also included a journal and pen. The idea was that the gift receiver would open the jar each week and pull out one piece of paper, untie it, read the slip of paper, and then make a little note in the journal about that blessing. Once the jar was empty, the following year they were to write new blessing down and put them into the jar. This idea can be adapted to a number of themes.......activities to do with the kids, "Reasons Why I Love You", a "date" jar, etc.....
To make this adorable, simple craft you will need the following items:
*Glass jar - I used a cookie style jar with a metal screw on lid. Purchased at a local craft store
*White printing paper
*Two or more colors of thinner ribbon
*Mod Podge
*1 piece of scrapbooking paper of your choice(I coordinated with my ribbons)
*1 Metal(or other) embellishment - again, many choices can be found in the scrapbooking section
of crafting stores.
*Glue gun and glue stick
*Optional - item that represents something important to the person receiving the gift.
*Scissors or paper cutter
Instructions:
Begin by making a listing of items that are pertinent to your chosen topic. For me, I wrote down 52 individual blessings. Now you can either type and print these onto paper and then cut or cut individual strips and hand write the items on each piece of paper. Once the previous step is complete, cut the appropriate number of lengths of ribbon( I had 52 pieces each about 3" long) out of your two chosen colors. Now(this is a bit tedious I will admit) roll and tie each piece of paper and place it into the jar.
Next you will lay the lid of your jar on the backside of your paper and trace the outline. Cut it out. Apply a thin layer of mod podge to the lid and then place the paper(design side up) onto the lid. Allow to dry completely and be sure to check for any air bubbles. If you want a glossier finish, you can apply a second coat of mod podge to the top of the paper once the application layer has dried. While the paper drying, I cut two lengths of each color ribbon. The lengths will be dependent upon the circumference of the jar opening and how much ribbon you want to hang loose. Wrap these pieces of ribbon around the neck of the jar and tie in a knot allowing the excess to cascade. Once your lid is completely dry, attach your chosen embellishment to the lid as well.
I then included a letter explaining how it was to be used. Enjoy!
Thursday, January 26, 2012
A Little LOVE.......
With Valentine's Day quickly approaching I made this cute little Love craft. It adds a little seasonal decor to the house or it could be given as a gift as well. After it was complete, it got me to thinking about what the word means to me. I believe it means something different for everyone. But, to me love is a hug from my child after a tough day. Love is the undying devotion that my husband and I have for one another. Love is always trusting those we care about, always supporting people around us, always giving of ourselves, always listening, always being there for each other - no matter what! Love is infinite. Love can't simply be tossed aside. Love is an eternal bond. Love is a light. Love is life!
For those meanings(and more) I enjoy seeing this 4 letter word. This little craft is relatively simple to make too!
Supplies:
Wooden letters L, O, V, E - these are available at most craft stores and the ones I purchased were about
$2 per letter ($8)
Mod Podge (a bottle will cost about $4 for a small one)
4 differently patterned scrapbooking papers - I tried to theme mine around the word. These 12x12 papers
typically range in cost from .50 cents to $2.00 depending on the paper($2.00)
A foam brush(.50 cents)
Trinkets - you can also add any metal trinkets you may find.....keys, hearts, frames, etc....These can also
be found at most local craft stores in the scrapbooking area.
Basic Cost: $15.00(approximately)
Other: Glue gun and glue sticks or liquid nails
Instructions:
*Trace letters on back side of scrapbook paper. Be sure that the "up" side of the paper will lay correctly on the letter once it is placed on top.
*Cut out each letter.
*Put a light coat of Mod Podge on top of a letter(be sure you only do one letter at a time so the mod podge doesn't dry to quickly). Then lay the cut out paper letter on top of the wooden letter that has been covered with Mod Podge. Repeat on remaining letters. Be sure to let this dry and check every few minutes for any air bubbles that may appear. If they do, simply smooth them out. I often get a few bubbles and some remain, but that is "OK".
*Once the paper has dried to the letter, you can either put on a (very light) top coat of Mod Podge over the paper to add a little luster or you can simply let the paper be as is. If you have used a paper that has glitter or more of a velvety feel, I would recommend not doing another top layer.
*Once everything is dry you can add any trinkets if you wish to do so.
*The final step is optional. I glued my letters together using glue sticks so that they would sit on a ledge or counter top more stably.
Done!
The OTHER Florida - Part 1
When most people think of a vacation in Florida, the first thing that pops into their mind are the theme parks. But, what many do not realize is that Florida has a lot of other, more natural and local, sights and activities to offer as well. We moved to Florida in 1998 and in the nearly 14 years that we have been here I have been lucky enough to enjoy some of the great other parts of Florida. Don't get me wrong, the theme parks area great! Our daughter and I get a yearly pass to one park each year and we greatly enjoy our days at the theme park. But, there is also a bit more hidden part of Florida that so many visitors to this State never even begin to explore. The photo above was taken while on an air boat ride on the St John's River basin, just west of Orlando. During the hour long ride, we saw over 30 "gators" and a more natural side to Florida that was beautiful! Read on for a few of my favorite "other" Florida attractions. Enjoy Part one of my "other" Florida postings.
Relaxing days at the beach. One of our favorite family outings is a day at the beach. We are lucky in that we have so many wonderful beaches within an hour of our home. For me, there is nothing more relaxing then spending a day at the beach, building sandcastles, sitting in a chair with sand between my toes, playing in the waves, and watching my "boys" surf. We prefer the east coast beaches as there are waves on the east coast(a must for surfing). The further north you go on the east coast, the softer the sand gets. Some of our favorites are South Cocoa Beach(Tables), New Smyrna Beach(near the Jetty), and St Augustine Beach(Butler Beach area). The west coast of Florida also has amazing beaches. We haven't been to the panhandle area beaches, but they are to be amazing. Sanibel Island has beautiful, natural beaches. Ft. Myers beach is great for those wanting a bit more "action". Then, for those wanting all the excitement, there is South Beach in Miami. While we prefer the more "low key" beaches, there really is a beach in Florida for nearly everyone's style.
Mangrove trees can be found nearly everywhere. They are an interesting tree as their root systems can expand great distances. Most alligators have their egg nesting areas in mangrove tree forests. Getting back into these areas gives one almost a surreal feeling as life is so still, quiet, and you really get a feel for the natural Florida.
The many city parks within Central Florida alone is astounding. One of the most beautiful parks is Lake Eola located in downtown Orlando. They have a wonderful playground, a small Japanese style garden, a running path that circles the lake, expansive grassy areas to relax or play a game, and it is not uncommon to see Tai Chi classes or people meditating. On Sundays there is also a great, year round, farmer's market.
Life in The Florida Keys is somehow simpler, quieter(for the most part), and just laid back. Everyone is familiar with the islands of Key Largo and Key West. But, we really enjoy Islamorada, Marathon, and Bahia Honda.
Blue Springs State Park is one of several parks within the state that has a natural spring. The water is amazingly clear and at this particular park, those that are certified scuba divers, can dive into the springs crevice. The water is a year round 72 degrees and in the summer, although it is a bit chilly at first, it is fun to ride in an inter tube down the river. In cooler months, the gentle Manatee loves to make these waters their home.
While Florida is not known for its' big wave surfing, the east coast has several areas that are great for small to mid height waves. The fact that one can surf year round(part of it with a wet suit) is a plus as well. We typically like the Tables area in South Cocoa, but also enjoy surfing the jetty in New Smyrna and catching some waves in St. Augustine. You will see all types of boards and all levels of experience in surfers. Surfing is part of Florida.
Hiking on area trails is another great activity. Most of the state parks offer trails such as pictured at the right. Again, it is easy to imagine yourself in another time period when walking along one of these trails as you take in the natural vegetation and animal life.
The warm to mild year round climate in Florida allows farmer's markets to operate all year! A weekend visit to one of the farmer's markets is another of our favorite activities. I personally love the market in Winter Park as we follow up our visit with some time in the park playing kick ball and just relaxing.
Another great activity in the Winter Park area(just north of downtown Orlando) is the boat tour on the chain of lakes. Years ago, the city made Venetian style canals that connect a series of lakes in the area. A local company offers (nearly) daily tours of the lake and give a great history of the area. For those that love SUP's(Stand Up Paddle Boards) there is now a company that offers SUP tours on the lakes as well.
Horseback riding. If your an avid horse rider, or just want to try it out, there are several horse riding ranches in the Central Florida area. Again, the year round weather makes it typically more ideal for all types of riding.
Beautiful ocean views. I can never get enough of these. There is something about walking on a boardwalk, crossing over the dunes, and seeing the beauty of the ocean sprawling out before you. Many of the east coast beaches are also home to turtle nesting and this is an amazing event to see!
Lighthouses - Florida's got those as well. The one pictured here is at the jetty in New Smyrna. Many people don't know, but it is actually the second tallest lighthouse in the United States and it is still operational. There is another great lighthouse in St. Augustine that (for those of you that like ghost stories) is even said to be haunted.
One of our favorite, short getaway, destinations is St. Augustine Florida. This historic city is home to Castillo de San Marcos, the Oldest School House, and has so much to offer. We enjoy strolling down the streets, watching the horse drawn carriages, and stopping for some candy at one of the local sweet shoppes. They have some great city tours as well.
The west coast of Florida has wonderful beaches as well. The water on the west coast is typically much calmer and a bit warmer due to currents. One of our favorite areas is Sanibel Island. This island is known as one of the best shelling islands in the world and nearly every morning you will see people walking along the beach and doing, what locals call, the Sanibel Stoop. Life on Sanibel and Captiva Islands is very laid back and very relaxing!
So, there is part one of my "Other Florida". More will come in the future, but I hope this gives you a taste of other activities available in Florida outside of the ever-so-famous theme parks. I wish you all sunny days!
Relaxing days at the beach. One of our favorite family outings is a day at the beach. We are lucky in that we have so many wonderful beaches within an hour of our home. For me, there is nothing more relaxing then spending a day at the beach, building sandcastles, sitting in a chair with sand between my toes, playing in the waves, and watching my "boys" surf. We prefer the east coast beaches as there are waves on the east coast(a must for surfing). The further north you go on the east coast, the softer the sand gets. Some of our favorites are South Cocoa Beach(Tables), New Smyrna Beach(near the Jetty), and St Augustine Beach(Butler Beach area). The west coast of Florida also has amazing beaches. We haven't been to the panhandle area beaches, but they are to be amazing. Sanibel Island has beautiful, natural beaches. Ft. Myers beach is great for those wanting a bit more "action". Then, for those wanting all the excitement, there is South Beach in Miami. While we prefer the more "low key" beaches, there really is a beach in Florida for nearly everyone's style.
Mangrove trees can be found nearly everywhere. They are an interesting tree as their root systems can expand great distances. Most alligators have their egg nesting areas in mangrove tree forests. Getting back into these areas gives one almost a surreal feeling as life is so still, quiet, and you really get a feel for the natural Florida.
The many city parks within Central Florida alone is astounding. One of the most beautiful parks is Lake Eola located in downtown Orlando. They have a wonderful playground, a small Japanese style garden, a running path that circles the lake, expansive grassy areas to relax or play a game, and it is not uncommon to see Tai Chi classes or people meditating. On Sundays there is also a great, year round, farmer's market.
Life in The Florida Keys is somehow simpler, quieter(for the most part), and just laid back. Everyone is familiar with the islands of Key Largo and Key West. But, we really enjoy Islamorada, Marathon, and Bahia Honda.
Blue Springs State Park is one of several parks within the state that has a natural spring. The water is amazingly clear and at this particular park, those that are certified scuba divers, can dive into the springs crevice. The water is a year round 72 degrees and in the summer, although it is a bit chilly at first, it is fun to ride in an inter tube down the river. In cooler months, the gentle Manatee loves to make these waters their home.
Hiking on area trails is another great activity. Most of the state parks offer trails such as pictured at the right. Again, it is easy to imagine yourself in another time period when walking along one of these trails as you take in the natural vegetation and animal life.
The warm to mild year round climate in Florida allows farmer's markets to operate all year! A weekend visit to one of the farmer's markets is another of our favorite activities. I personally love the market in Winter Park as we follow up our visit with some time in the park playing kick ball and just relaxing.
Another great activity in the Winter Park area(just north of downtown Orlando) is the boat tour on the chain of lakes. Years ago, the city made Venetian style canals that connect a series of lakes in the area. A local company offers (nearly) daily tours of the lake and give a great history of the area. For those that love SUP's(Stand Up Paddle Boards) there is now a company that offers SUP tours on the lakes as well.
Horseback riding. If your an avid horse rider, or just want to try it out, there are several horse riding ranches in the Central Florida area. Again, the year round weather makes it typically more ideal for all types of riding.
Beautiful ocean views. I can never get enough of these. There is something about walking on a boardwalk, crossing over the dunes, and seeing the beauty of the ocean sprawling out before you. Many of the east coast beaches are also home to turtle nesting and this is an amazing event to see!
Lighthouses - Florida's got those as well. The one pictured here is at the jetty in New Smyrna. Many people don't know, but it is actually the second tallest lighthouse in the United States and it is still operational. There is another great lighthouse in St. Augustine that (for those of you that like ghost stories) is even said to be haunted.
One of our favorite, short getaway, destinations is St. Augustine Florida. This historic city is home to Castillo de San Marcos, the Oldest School House, and has so much to offer. We enjoy strolling down the streets, watching the horse drawn carriages, and stopping for some candy at one of the local sweet shoppes. They have some great city tours as well.
The west coast of Florida has wonderful beaches as well. The water on the west coast is typically much calmer and a bit warmer due to currents. One of our favorite areas is Sanibel Island. This island is known as one of the best shelling islands in the world and nearly every morning you will see people walking along the beach and doing, what locals call, the Sanibel Stoop. Life on Sanibel and Captiva Islands is very laid back and very relaxing!
So, there is part one of my "Other Florida". More will come in the future, but I hope this gives you a taste of other activities available in Florida outside of the ever-so-famous theme parks. I wish you all sunny days!
Wednesday, January 25, 2012
Family Fun In The Florida Keys
During this past summer, in July of 2011, our family decided to have a small gathering in The Florida Keys. It was a place my father had always wanted to visit and it held a lot of allure for me and my family as well. There ended up being 10 people that ventured to the Islands. Of that there were 2 grandparents, 4 middle aged adults, 2 teenagers, a middle school child, and a toddler. We had to be sure that there was something to do for everyone, so planning was important. We really wanted a place that would fit all of us in one unit/home and not several different hotel rooms. We also wanted to be sure that there were good dining options and activities that everyone would enjoy. Being that I had over 15 years experience in the travel industry, I got the job of doing the leg work and I enjoyed it! If you are looking to vacation in The Florida Keys and you are going with several generations or even just you and the kids there are some details that I think are beneficial to consider. Read on for a few pointers and lots of information on The Keys!
Planning: We knew we wanted to rent a house and we knew the kids would love beach access. You may or may not know this, but The Florida Keys are not really known for their plethora of beaches. They exist, but you need to know where they are and what they are like before you go. For this reason, I really recommend the islands of Islamorada, Marathon, or Big Pine Key. You can find hundreds of home and condo rentals on sites such as vrbo.com, cyberrentals.com, and homeaway.com. Part of the reason we usually rent homes on vacation is that it is nice to have a full kitchen, the privacy of a home, individual bedrooms, and still all be in one place. Plus, many homes can be found if you must take along your pets as we do. We found a home in Key Colony Club on Marathon that had 3 bedrooms and was situated right on a canal. Part of the reason we opted for Marathon was it's centralized location among The Keys. The kids loved having the canal and kayaks to paddle around in. The Key Colony Club also had a community pool and a small beach area that were both within walking distance of the home. Living in Orlando, we had about a 7 hour drive. Those from "Up North" flew into Miami and drove the 1 1/2 hours to Marathon. It is an easy drive, but much of it is on a two lane road - one in each direction.
Activities: At first I was a bit concerned about finding activities that everyone, from a toddler to grandparents, would enjoy doing. But, we learned that there was more than enough to do. Our first full day in The Keys we drove about an hour south and ventured into Key West. We explored the shops on Duval Street, stopped for drinks(fresh coconut milk) at the Southern Most Point, had some Key Lime Pie, went by Hemingway's home, ate a lot, and finished the day in Mallorey Square watching the performers and the beautiful sunset.
The next day we had a leisurely morning then headed for a snorkeling trip to Sombrero Reef. Several of our group had never snorkeled before and were delighted by the fish and even saw a shark! Yes, we all lived to tell. My father, whom is in a wheelchair, was even helped onto the catamaran(along with his assistance dog) so that he could watch the grand kids snorkel and be with family. We went with Spirit Snorkel on Marathon. They provided our toddler aged daughter with a life vest and a small raft that had a pull string so that I could pull her around as I snorkeled. Now, our daughter has grown up seeing the big blue ocean, so for her seeing the expansive sea was not threatening. We were a few miles out in the ocean, she was happily(or as I thought) floating along on her raft when all of the sudden - plop! - she was in the water. I asked if she wanted help getting back on the raft and she looked at me and said...."NO! I want to swim with the fishies in the ocean ALL BY MYSELF!", and thus she did. The crew also gave her food to feed the fish and she loved them swimming all around her! The teenagers(as seen above) also had a great time exploring.
On another day we drove over 7 mile bridge to Bahia Honda State Park. There is another wonderful snorkeling trip available from the park and two of our group opted for that. The rest of us rented a few canoes, paddled around, and enjoyed a wonderful day at a beautiful beach. The park does offer rentals of beach wheelchairs as well and they will deliver them to whichever part of the park you will be at. Prices are all reasonable too. We played in the ocean and sat in the water for much of the day before we headed out to a unique dining experiences(see dining below).
Another great stop on Marathon is The Turtle Hospital. This facility rescues, rehabilitates, and returns sea turtles to the ocean(if/when possible). They have a few permanent residents, but most are released once better. The presentation at the beginning of the tour is a bit slow, but interesting. You get to view the hospital and operating rooms. But, the best part is when you get to go and visit the turtles and even feed them! Being as I love turtles(I even sport the "Save the Turtles" plate on my car), this was a great experience.
During our final day in The Keys, six of us opted to try out parasailing on Marathon while grandma and grandpa took the two youngest to a playground and historical home on Marathon. The company we went with offered tandem rides. It was amazing. I had been parasailing before, but it was a great experience to share with our teenage son. My youngest sister also got to share in it with her teenage daughter. People were hanging upside down in the harness, getting a little wet when dipped into the ocean, and simply enjoying the beauty one can only get when nearly 1000 feet in the air! Earlier that day we had also traveled to Islamorada to do a little shopping and to see Betty - a much larger than life lobster sculpture.
There really is a lot to do. There are dolphin swims, boat charters, fishing charters, jet ski rentals, museums, and more! We also simply enjoyed hanging out around the house, walking to the beach and club house pool, and playing Uno and Settlers of Catan.
Food: When we go on vacation we love to eat! The Keys have some amazing options to choose from that serve some simply delicious food. While on Key West we ate at Sloppy Joe's. Oh my! You simply must eat here and you must try either the Sloppy Joe's or their sloppy fries. To die for! After our day at Bahia Honda State Park, we went on a hunt to find "The No Name Pub". Their slogan is.....A great place to visit. If you can find us. When you walk through the doors, you are greeted by (literally) millions of dollars all hanging from the ceiling and walls. We pulled out some dollar bills, which we added our own artistic flair to and up on the wall they went. Finding a place to put them was the hardest part. While there we ordered three of their famed pizzas and they were gone quickly! Marathon also has several great dining options. One of our favorites was Porky's Bayside. It is a place that has been visited by such stars as Ernest Hemingway, Jimmy Hoffa, and Elizabeth Taylor. The seafood was amazing to say the least, as was the BBQ! Our son and his teenage cousin tried clams for the first time as well. One loved them, the other - well, not so much! Other great dining options we tried included The Keys Fisheries, The Island Fish Company, Castaways, and Sparky's Landing. All wonderful.
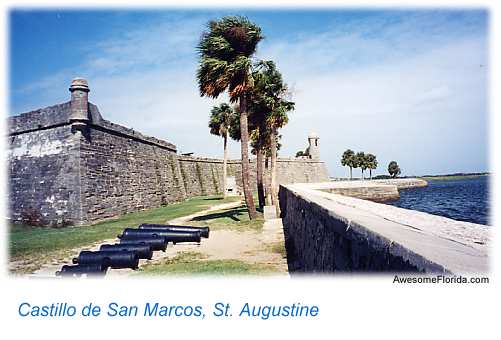
In a nutshell, The Florida Keys are a great location for a family vacation/gathering, you just need to do some homework to make sure that you find a location in the Keys that is great for your wants/needs. If interested, there are also boat rentals available on most islands and the world of SUP's(Stand Up Paddle boards) has also made its' way do the calmer waters of The Keys. A great place to start planning is at The Florida Keys official tourism web site at www.fla-keys.com. They provide links to activities, dining, lodging(hotels, home rentals, condos), and more. We spent one week in The Keys and we probably could have easily spent another week. The quiet mornings spent relaxing and looking out over the canal, the water sports, kayaking, shopping, dining, and evenings spent together as a family were memories that I will always cherish. I think I took nearly 400 photos(those are what I kept!). Below are a few other snapshots from our little expedition. I would definitely recommend The Keys as a family/generation friendly vacation destination!
The No Name Pub with just some of the (literally) thousands of dollars hanging on the walls and ceiling!
The view from Mallorey Square, on Key West, just moments before the sunset.
Time to enjoy some delicious food at Porky's Bayside! It is located on a marina and all seating is "outside" under a roof.
Planning: We knew we wanted to rent a house and we knew the kids would love beach access. You may or may not know this, but The Florida Keys are not really known for their plethora of beaches. They exist, but you need to know where they are and what they are like before you go. For this reason, I really recommend the islands of Islamorada, Marathon, or Big Pine Key. You can find hundreds of home and condo rentals on sites such as vrbo.com, cyberrentals.com, and homeaway.com. Part of the reason we usually rent homes on vacation is that it is nice to have a full kitchen, the privacy of a home, individual bedrooms, and still all be in one place. Plus, many homes can be found if you must take along your pets as we do. We found a home in Key Colony Club on Marathon that had 3 bedrooms and was situated right on a canal. Part of the reason we opted for Marathon was it's centralized location among The Keys. The kids loved having the canal and kayaks to paddle around in. The Key Colony Club also had a community pool and a small beach area that were both within walking distance of the home. Living in Orlando, we had about a 7 hour drive. Those from "Up North" flew into Miami and drove the 1 1/2 hours to Marathon. It is an easy drive, but much of it is on a two lane road - one in each direction.
Activities: At first I was a bit concerned about finding activities that everyone, from a toddler to grandparents, would enjoy doing. But, we learned that there was more than enough to do. Our first full day in The Keys we drove about an hour south and ventured into Key West. We explored the shops on Duval Street, stopped for drinks(fresh coconut milk) at the Southern Most Point, had some Key Lime Pie, went by Hemingway's home, ate a lot, and finished the day in Mallorey Square watching the performers and the beautiful sunset.
The next day we had a leisurely morning then headed for a snorkeling trip to Sombrero Reef. Several of our group had never snorkeled before and were delighted by the fish and even saw a shark! Yes, we all lived to tell. My father, whom is in a wheelchair, was even helped onto the catamaran(along with his assistance dog) so that he could watch the grand kids snorkel and be with family. We went with Spirit Snorkel on Marathon. They provided our toddler aged daughter with a life vest and a small raft that had a pull string so that I could pull her around as I snorkeled. Now, our daughter has grown up seeing the big blue ocean, so for her seeing the expansive sea was not threatening. We were a few miles out in the ocean, she was happily(or as I thought) floating along on her raft when all of the sudden - plop! - she was in the water. I asked if she wanted help getting back on the raft and she looked at me and said...."NO! I want to swim with the fishies in the ocean ALL BY MYSELF!", and thus she did. The crew also gave her food to feed the fish and she loved them swimming all around her! The teenagers(as seen above) also had a great time exploring.
On another day we drove over 7 mile bridge to Bahia Honda State Park. There is another wonderful snorkeling trip available from the park and two of our group opted for that. The rest of us rented a few canoes, paddled around, and enjoyed a wonderful day at a beautiful beach. The park does offer rentals of beach wheelchairs as well and they will deliver them to whichever part of the park you will be at. Prices are all reasonable too. We played in the ocean and sat in the water for much of the day before we headed out to a unique dining experiences(see dining below).
Another great stop on Marathon is The Turtle Hospital. This facility rescues, rehabilitates, and returns sea turtles to the ocean(if/when possible). They have a few permanent residents, but most are released once better. The presentation at the beginning of the tour is a bit slow, but interesting. You get to view the hospital and operating rooms. But, the best part is when you get to go and visit the turtles and even feed them! Being as I love turtles(I even sport the "Save the Turtles" plate on my car), this was a great experience.
During our final day in The Keys, six of us opted to try out parasailing on Marathon while grandma and grandpa took the two youngest to a playground and historical home on Marathon. The company we went with offered tandem rides. It was amazing. I had been parasailing before, but it was a great experience to share with our teenage son. My youngest sister also got to share in it with her teenage daughter. People were hanging upside down in the harness, getting a little wet when dipped into the ocean, and simply enjoying the beauty one can only get when nearly 1000 feet in the air! Earlier that day we had also traveled to Islamorada to do a little shopping and to see Betty - a much larger than life lobster sculpture.
There really is a lot to do. There are dolphin swims, boat charters, fishing charters, jet ski rentals, museums, and more! We also simply enjoyed hanging out around the house, walking to the beach and club house pool, and playing Uno and Settlers of Catan.
The No Name Pub with just some of the (literally) thousands of dollars hanging on the walls and ceiling!
The view from Mallorey Square, on Key West, just moments before the sunset.
Time to enjoy some delicious food at Porky's Bayside! It is located on a marina and all seating is "outside" under a roof.
Subscribe to:
Posts (Atom)